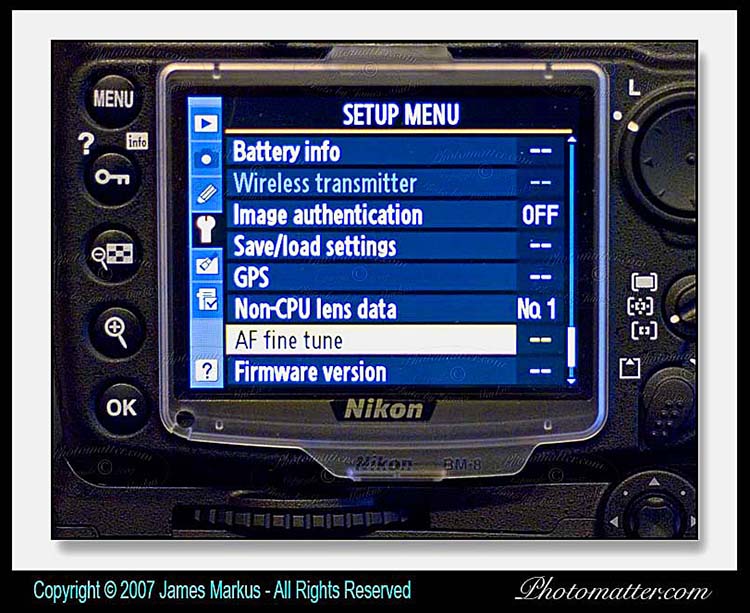
Go to the setup menu and scroll to AF Fine Tuning, and arrow right.
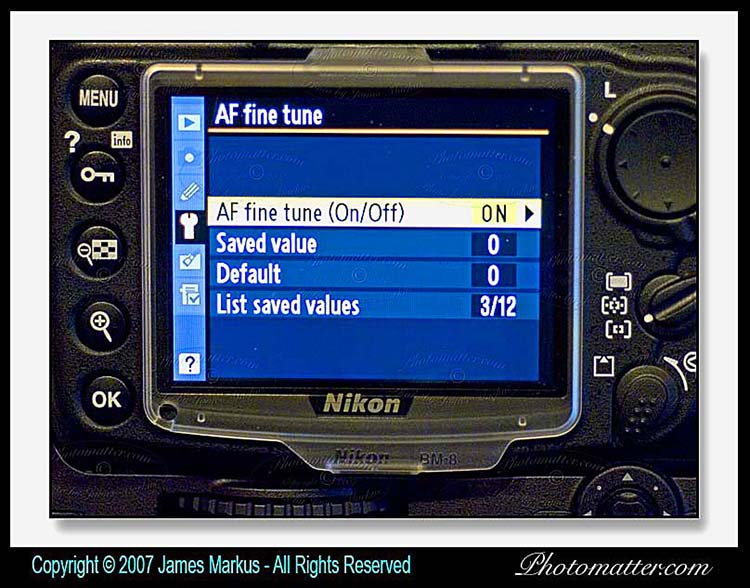
First you have to turn the AF Fine Tuning On. So, arrow right again
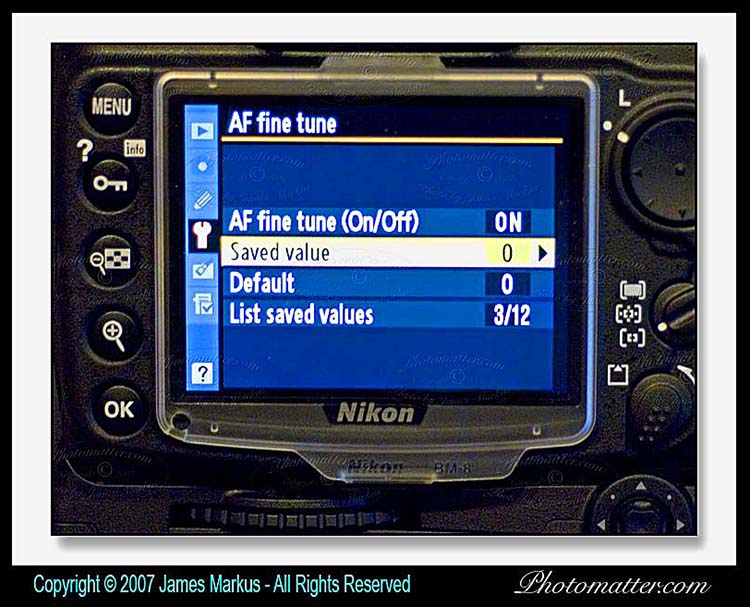
Once you have arrowed to on, (use "ok" button) you down arrow to saved value, and arrow right
This brings you to the adjustment screen. Your lens should already be identified
by the CPU it carries. If not you will have to ID the lens to the camera.
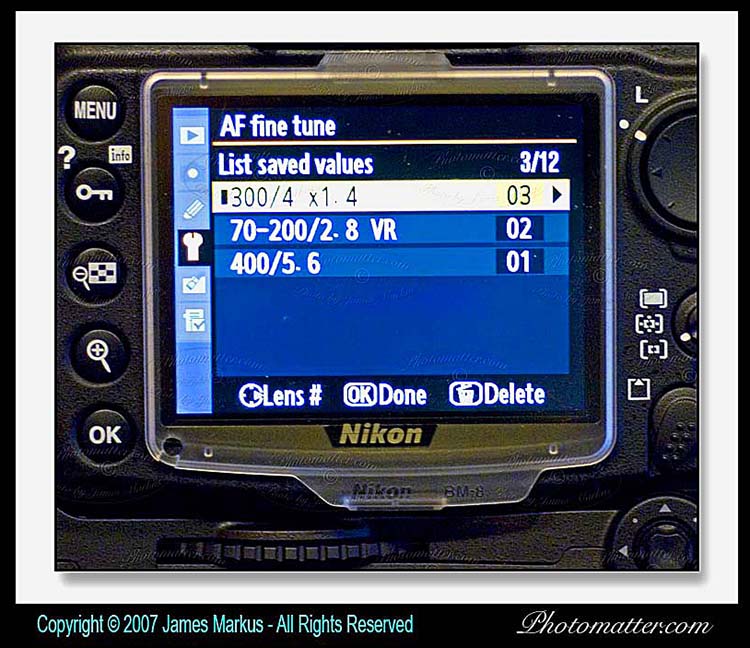
Once you have made your adjustment you can go back to the previous screen and save
that value for that particular lens. Plus you give it an idenifying number between 00-99 (even though
the camera will store only 12 settings) From that point on...if you leave AF Fine Tuning turned on,
the camera will automatically adjust each lens that you mount, and have saved an adjustment value.
I wanted to see if the Sigma 400mm f5.6 APO Macro lens from Part I of this review could be
tweaked to perform even better - even though it already was sharper on the D300 than the D2x.
Here is the setup and the rationale.
1-I disabled all in camera sharpening by setting it to 0.
2-I lowered the contrast setting as well by one notch from the default. I didn't want contrast
to add a false sharpness by enhancing the edges. So, I made the image flatter than I would
normally think correct. I wanted true edge sharpness.
3- I choose a static object that had some depth which would give me clues about which direction
to adjust the camera. I used an incense box.
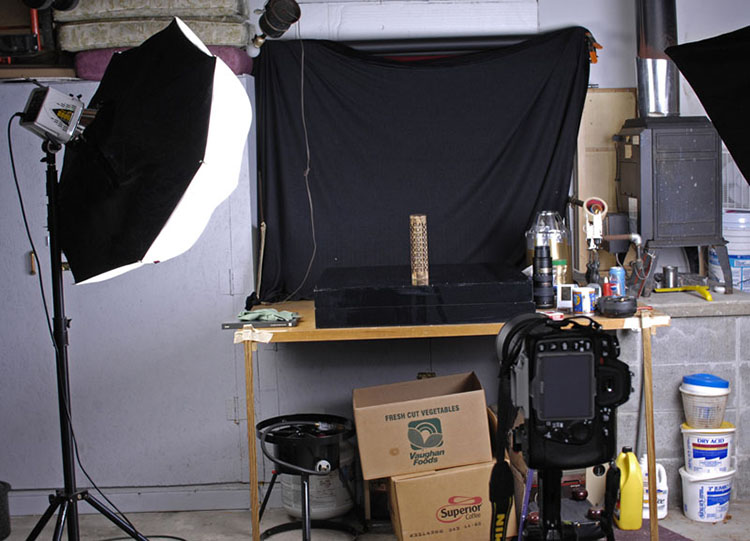
4-I mounted the camera on a tripod exactly the same height and perpendicular to the box.
5-Next I used two strobes roughly 45 degrees on either side. Modifiers were a brolly, and softbox.
6-I set the lens to it's widest aperture - in this case f5.6. I wanted the narrowest DOF as possible.
7-I set the synch to the highest the camera will support in an external strobe. In this case 1/250th
of a second.
8-I deliberately unfocused the image between each shot.
9-I focused on the same point each time.
Here is what my test setup looked like. (pardon the mess)
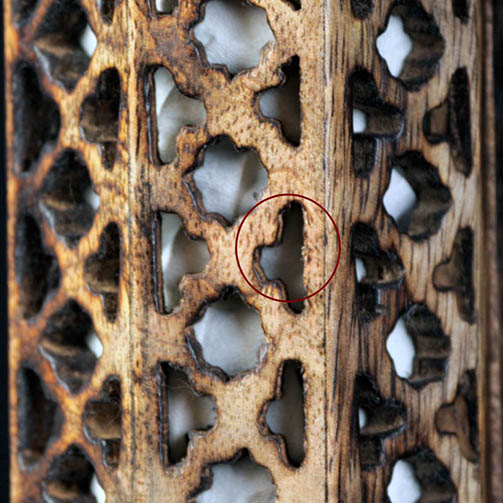
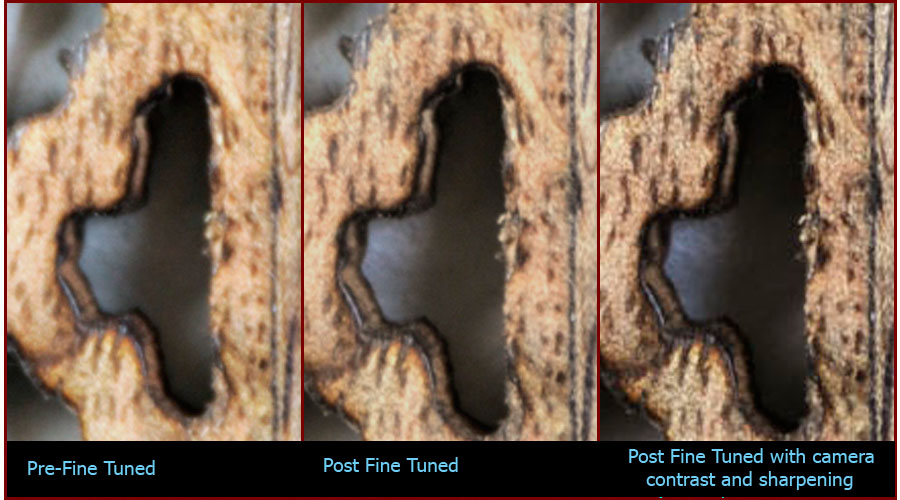
This first image is what all that setup produced. I have adjusted these slightly by doing a global white
balance via using the same threshold point in a curves dialog box. There is no post processing USM
or any other changes on any of these photos. I marked the same focus point for all the images with the
maroon circle on the first pre-calibrated photo.
Shot ONE Pre-FineTuned
Finding the correct setting was more time consuming than I had expected. First, my eyes (late 40's)
are not that good, and second progressive bifocals are a difficult. So, I reverted to putting my face close
to the LCD, and trying to remember the previous image's sharpness compared to the one I was then
viewing. I was zoomed in 4-5 clicks each time. The stradegy is simple. The initial dialog is set to 0 with
adjustments to +20, and -20. I shot one each at 0, -5. and +5. That eliminated half the scale right there.
Then I shot at 10, 15, and 20 of that side of the scale. That got me close. Then I went back and forth
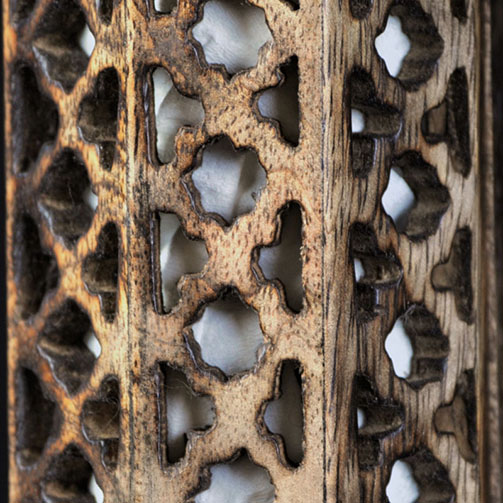
between roughly 11 and 17 until I settled on 13 as the absolute best for this Sigma 400mm lens. I then
saved the setting. Here is the result.
Shot TWO POST FineTuned
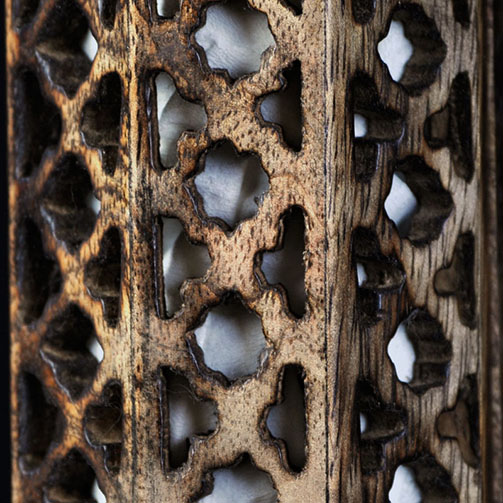
Then I set the camera back to my prefered contrast and sharpness settings. I do have one untested
concern left. Since I shot from about 12 feet away, I hope the adjustment is good for all distances. I
will have to shoot some birds and we will see. Here is the image with restored sharpness and
contrast camera settings.
Camera sharpness, and contrast settings restored
Here are all three side by side...which I think shows the improvement better.
In Conclusion, It would appear to be a very worthwhile pursuit. The Nikon D300 will store 12 CPU
lenses, and I intend to calibrate all my lenses. I also did my 70-200mm f2.8 AFS IF VR-G. The
adjustment I am not as confident in, but I settled on 2 which is close to no adjustment at all. I worry
that it may only be good at 200mm (the focal length I made the fine tune adjust at, but no where
near as dramatic a change as the Sigma 400mm showed. What a great feature to put on the D300
...Good one Nikon!
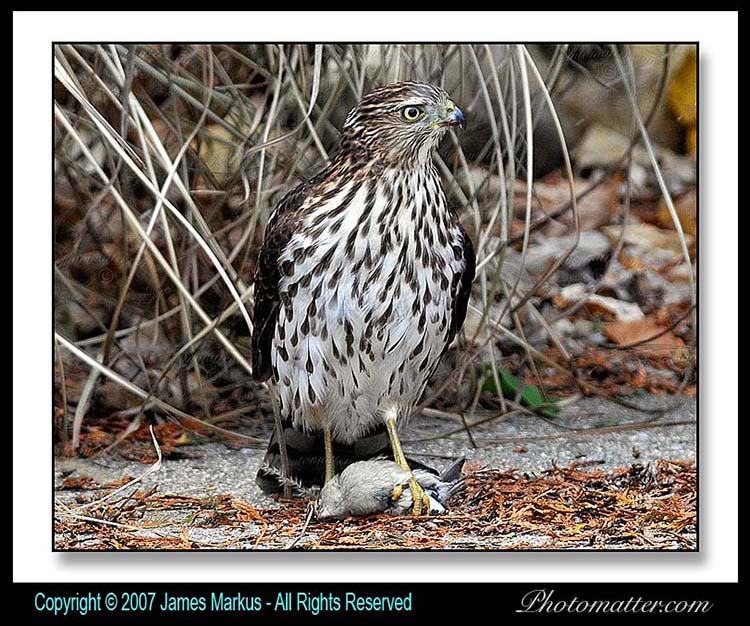
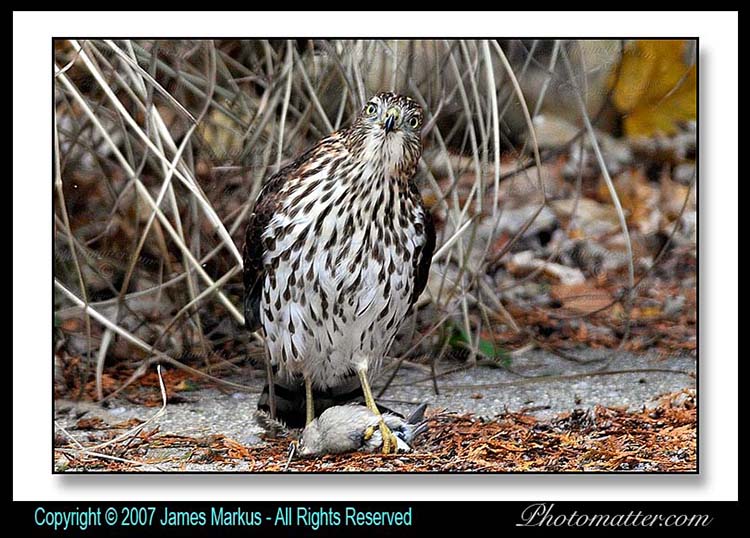
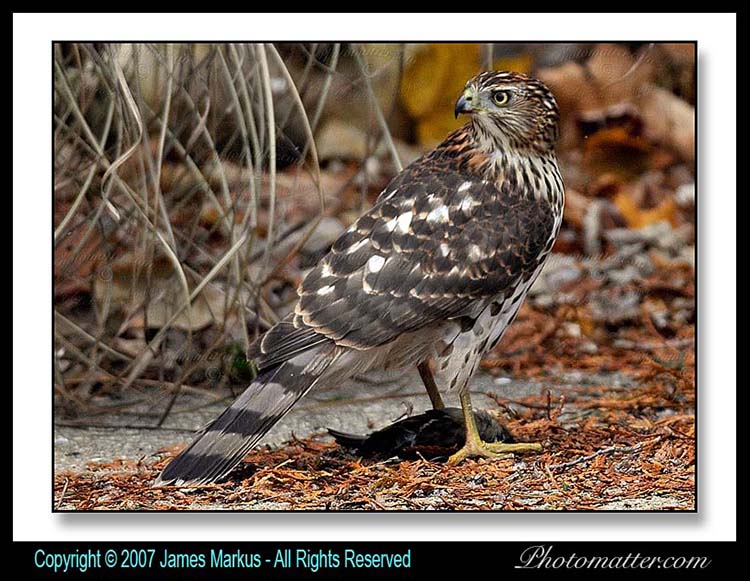
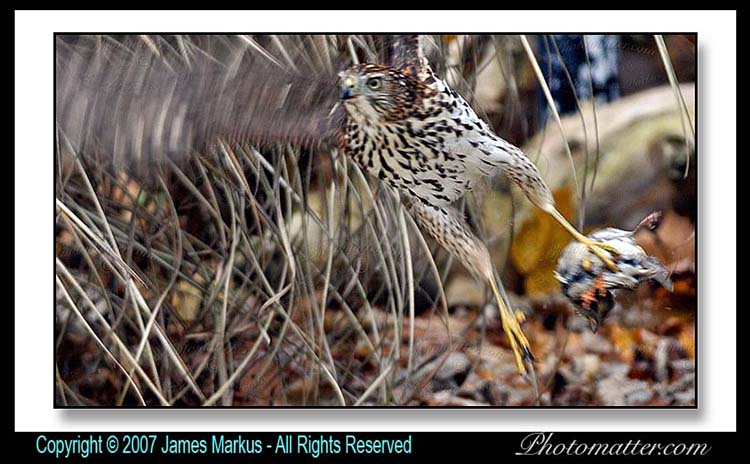
Lunch Addendum 11-29-07 - Bird shots with the D300 I was having my lunch...minding my own business, and BAM! This hawk smashed into my sliding
glass door. He/she must be the same bird my wife excitedly called about. I had the 300mm f4 AFS mounted
with a 1.4 Tamron AF SP TC...so that is what I used. The hawk flew off to a clump of pampas grass, and literally
dove right into it. The grass started shaking violently, and I saw sparrows flying out of the clump. I could hear one
bird that wasn't so lucky...then out popped the hawk - prize in talons. While this was all going on I crept as close to
the grass clump as I could...here are the results. Unfortunately, I hadn't fine tuned the 300mm yet, but it is one of
my sharpest lens anyway